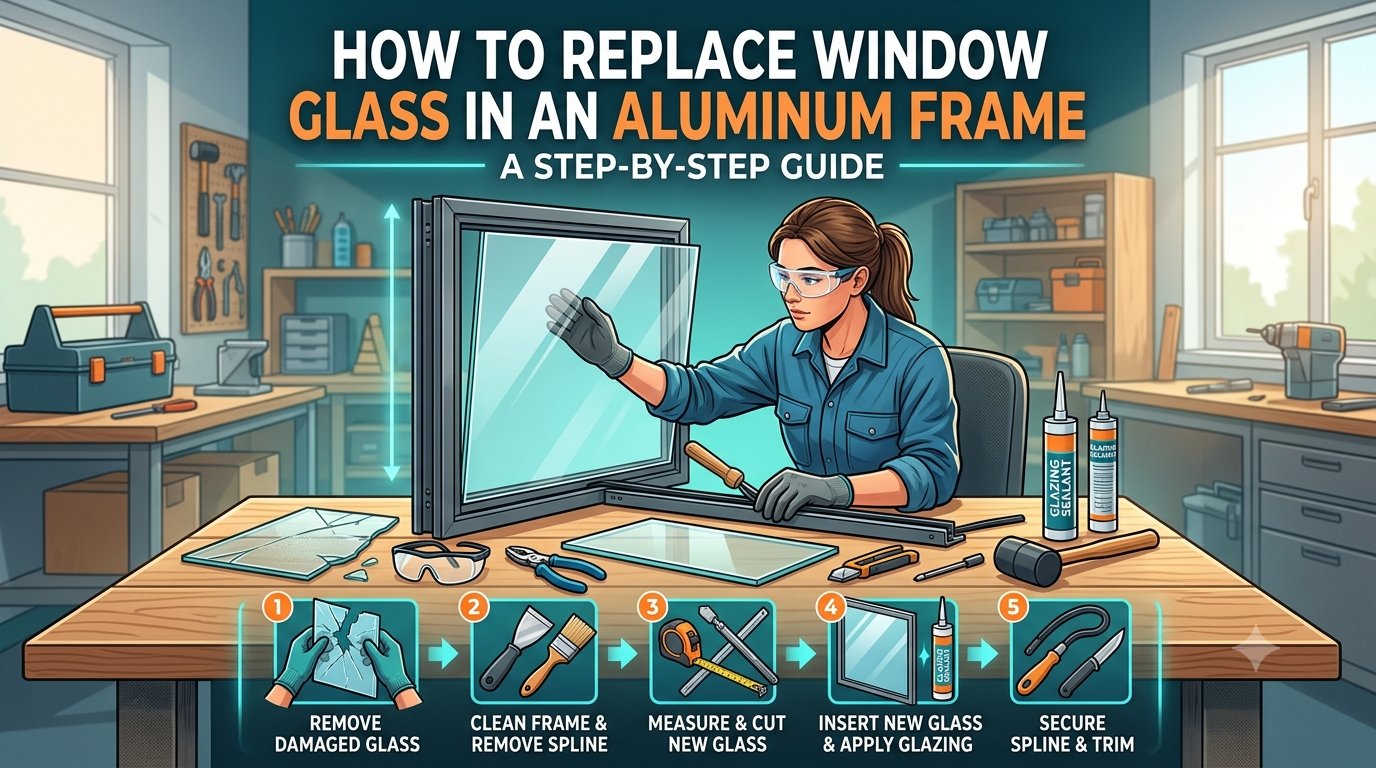
How to Replace Window Glass in an Aluminum Frame: A Step-by-Step Guide
Knowing how to replace window glass can help you evaluate a damaged aluminum window and decide whether glass-only replacement is practical. The work involves more than ordering a pane: you must identify the glazing system, select compatible glass, preserve drainage, and reinstall every component correctly.
This guide explains the general process for a small, intact pane in an accessible residential sash. Do not attempt to remove cracked, shattered, oversized, heavy, overhead, or difficult-to-access glass. Those conditions require professional equipment and handling.
Understand Your Aluminum Window Before Starting
Aluminum windows vary considerably by manufacturer and age. Some hold the glass with removable vinyl strips, while others use rubber gaskets, aluminum stops, sealant, or factory-assembled components.
The window glazing bead is the narrow strip around the pane that helps retain the glass and cover the space between the glass edge and sash. It may resemble trim, but it is part of the glazing system and must fit correctly.
Window type |
Common signs |
Recommended approach |
|
Single-pane sash |
One sheet of glass with a bead, gasket, or sealant |
Glass-only replacement may be possible |
|
Insulated glass unit |
Two or more panes separated by a sealed spacer |
Replace the complete sealed unit |
|
Fixed commercial glazing |
Glass secured directly in a storefront or structural frame |
Professional replacement recommended |
|
Damaged aluminum frame |
Bent corners, corrosion, loose joints, or drainage damage |
Assess the complete window before replacing glass |
Fog or moisture trapped between two panes usually indicates failure of the insulated glass seal. Seal failure can allow insulating gas to escape and moisture to enter, so replacing one individual sheet does not restore the original sealed assembly.
Is Aluminum Window Glass Replacement a DIY Project?
A do-it-yourself project may be reasonable only when the pane is intact, small enough to handle safely, located at ground level, and installed in a removable sash with an identifiable glazing system.
Arrange professional service when:
- The glass is cracked, loose, shattered, or bowed.
- The pane is large, heavy, elevated, or difficult to reach.
- The window contains tempered, laminated, tinted, coated, or insulated glass.
- The frame is fixed, structurally glazed, or part of a commercial storefront.
- You cannot identify the manufacturer’s removal procedure.
- The window is beside a door, stairway, shower, tub, or another potentially hazardous location.
- The aluminum frame is bent, corroded, leaking, or separating at the corners.
Do not cut glass at the property. Order a factory-cut pane or insulated unit that matches the required dimensions, thickness, edge treatment, coating, and safety classification.
Tools and Materials for a Suitable Small-Pane Project
The exact supplies depend on the window system, but a basic assessment may require:
- Safety glasses, cut-resistant gloves, long sleeves, and closed-toe shoes
- Tape measure and notepad
- Manufacturer-approved hand tools
- Plastic putty tool
- Drop cloth or protective work surface
- Matching glazing bead, gasket, setting blocks, or sealant
- Factory-cut replacement glass
- Glass-safe cleaner and lint-free cloths
Use only sealants, gaskets, and setting blocks that are compatible with the frame and glass assembly. An unsuitable product can damage coatings, interfere with insulated-glass edge seals, or prevent proper drainage.
How to Replace Window Glass in an Aluminum Frame
The following steps explain how to replace glass in aluminum frame systems at a general level. Your window manufacturer’s current instructions should take priority because bead profiles, gaskets, fasteners, and installation sequences vary.
1. Identify and Document the Glazing System
Photograph the complete window, sash corners, bead joints, gasket orientation, fasteners, and any product labels. Determine whether the pane sits in an operable sash or directly in a fixed frame.
Look for removable stops on the interior side. Do not pry an unidentified exterior component; it may be part of the frame, weather barrier, or drainage system.
2. Measure the Glass Correctly
Do not order glass from the visible dimensions alone. The pane extends behind the glazing bead, so the visible opening is smaller than the actual glass.
A glass professional may need to confirm:
- Actual glass width and height
- Glass or insulated-unit thickness
- Required edge clearance
- Single-pane or insulated construction
- Low-E coating, tint, texture, or privacy pattern
- Safety-glass requirements
- Spacer color and overall unit thickness
For insulated units, matching the complete thickness is especially important. A unit that is too thick or thin may not fit the original glazing pocket or bead.
3. Order the Replacement Before Disassembly
Order the factory-cut replacement and confirm its specifications before opening the frame. If the sash is removable, keep the window secured until the replacement is ready.
Store the new pane upright on an appropriate rack or protected surface. Never lay heavy glass where someone could step on it or where an unsupported edge could be damaged.
4. Prepare a Controlled Work Area
Keep children, pets, occupants, and foot traffic away. Protect nearby finishes and create a stable, level work surface for a removable sash.
If the existing glass is cracked or becomes unstable at any point, stop. Do not press on it, apply tape as a substitute for safe handling, or attempt to break it out of the frame.
5. Remove the Sash If the Design Allows
Unlock and remove the sash only according to the manufacturer’s procedure. Some sliding sashes lift out, while others use stops, clips, balances, or anti-lift devices.
Support the sash with another capable adult. If it does not release with controlled movement, do not force or twist the aluminum.
6. Release the Retaining Components
Anyone researching how to remove glass from aluminum window frames should first confirm that the pane is intact and manageable. For a suitable pane, carefully release the window glazing bead, gasket, or removable stop in the manufacturer-specified order.
Label each component by side and orientation. Avoid bending aluminum stops or stretching reusable gaskets. If a bead is brittle, distorted, or no longer locks into its channel, replace it with a matching profile.
7. Remove the Intact Pane
Keep the pane upright and fully supported. Lift it evenly without twisting, striking, or placing pressure on an unsupported corner.
If the glass binds in the frame, stop and have a glazier assess it. Hidden sealant, corrosion, or an incorrect removal sequence can make continued prying dangerous.
8. Clean and Inspect the Glazing Pocket
Remove loose debris without scratching the aluminum or damaging drainage paths. Inspect the frame for:
- Corrosion or distorted channels
- Failed corner joints
- Missing or hardened gaskets
- Damaged setting blocks
- Blocked weep openings
- Signs of water intrusion
- Remaining sealant that prevents an even fit
The Fenestration and Glazing Industry Alliance notes that window drainage pathways must remain clear for the unit to operate correctly.
9. Position the Replacement Glass
Place compatible setting blocks in the locations specified for the window system. Seat the pane evenly, maintain the required edge clearance, and avoid direct glass-to-metal contact.
Reinstall gaskets, sealant, stops, and beads in the documented or manufacturer-specified sequence. The components should lock into place without excessive force. Do not substitute caulk for a missing mechanical retaining component.
10. Reinstall and Test the Window
Return the sash to the frame and verify that it opens, closes, locks, and sits squarely. Check that beads remain seated and weep openings are unobstructed.
After the approved sealant has cured, inspect the window during normal weather for drafts, movement, or moisture entry. Water intrusion may originate around the frame or wall opening rather than the pane itself.
Common Window Pane Replacement Mistakes
Learning how to replace window glass correctly also means avoiding shortcuts that can cause repeat failure:
- Ordering from visible dimensions instead of the glazing pocket
- Replacing an insulated unit with a single pane
- Using the wrong glass thickness or safety classification
- Attempting to cut tempered or coated glass
- Reusing damaged beads, gaskets, or setting blocks
- Applying incompatible or excessive sealant
- Blocking drainage openings
- Forcing a sash or bead that does not fit
- Ignoring frame corrosion or water damage
What Affects Replacement Cost?
There is no reliable universal estimate for aluminum window glass replacement. Project cost depends on:
- Pane dimensions and thickness
- Single-pane or insulated construction
- Annealed, tempered, laminated, tinted, patterned, or Low-E glass
- Custom shapes or fabrication
- Availability of matching beads and gaskets
- Frame condition and repair needs
- Ground-level or elevated access
- Residential, commercial, or custom installation requirements
- Emergency protection or scheduling needs
A useful written estimate should identify the glass specification, labor scope, replacement components, access requirements, disposal, and any frame repairs. Final pricing generally requires project-specific measurements and inspection.
Portland Permits and Safety-Glass Considerations
Portland’s residential window guidance distinguishes same-location replacement from work that creates or widens an opening. It also warns that design or historic zones may have additional review requirements, while multi-unit and commercial projects follow different code provisions.
Tested and labeled safety glazing may be required in hazardous locations, including certain windows near doors, bathing areas, stairs, ramps, landings, and walking surfaces. Federal safety requirements also cover glazing in products such as doors, shower enclosures, and patio-type sliding doors.
Do not assume the existing glass remains acceptable simply because it has been in place for years. Confirm current permit, zoning, safety-glazing, and product requirements for the specific Portland property before ordering.
Maintaining the New Glass and Aluminum Frame
Clean the glass and frame with products approved by their manufacturers. Regularly inspect the glazing bead, gaskets, perimeter seals, tracks, and weep openings. Address loose components or moisture entry promptly, but remember that condensation on the room-facing surface differs from fog trapped between insulated panes.
Frequently Asked Questions
1. Can I replace only the glass in an aluminum window?
Yes, when the frame remains sound and a compatible replacement pane or insulated unit is available.
2. Can foggy double-pane glass be repaired without replacement?
Persistent fog between panes usually indicates a failed sealed unit, which generally requires complete insulated-glass-unit replacement.
3. What is a window glazing bead?
It is a removable strip that helps retain the glass and covers the space between the pane and sash.
4. Should I measure only the visible glass?
No, replacement glass must account for the portion concealed inside the glazing pocket.
5. Can tempered glass be cut to fit?
No, tempered glass must be fabricated to its final dimensions before tempering.
6. Can any silicone be used on an aluminum window?
No, use only a sealant approved as compatible with the specific glass, frame, coating, and insulated-unit seal.
7. When is safety glass required?
Requirements depend on the pane’s size, position, use, and proximity to doors, wet areas, stairs, and walking surfaces.
8. When should the entire window be replaced?
Consider complete replacement when the frame is damaged, leaking, difficult to operate, or unsuitable for the desired glazing.
Conclusion
Replacing a pane can preserve a serviceable aluminum frame, but accurate measurements, compatible materials, safe handling, and correct weather sealing are essential. When deciding how to replace window glass, treat broken, heavy, elevated, insulated, safety-rated, and commercial glazing as professional work rather than a routine DIY project.
Professional Glass Services in Portland
Readers who need professional residential, commercial, or custom glass repair, replacement, or installation services can contact The Glass People in Portland, Oregon. Their team can inspect the existing frame, explain suitable glass options, and provide project-specific guidance and an estimate based on actual site conditions.